How to Use the Check-in Guide?
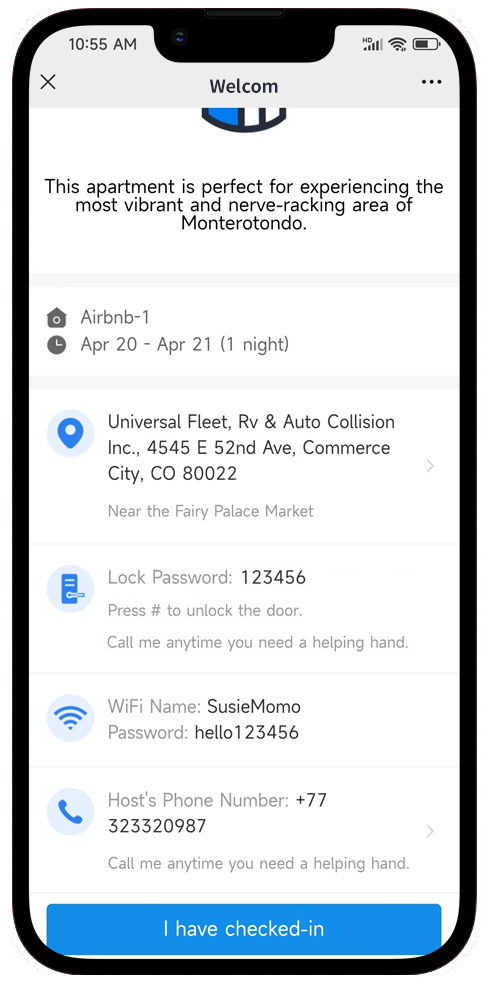
Via the check-in guide, guests can easily be informed of all the information from check-in to check-out, such as an address, lock code, WiFi password, check-out time, etc. , you can also collect deposits through it.
This feature can reduce a lot of workload for hosts in repeated inquiries.
How to Set Up the Check-in Guide?
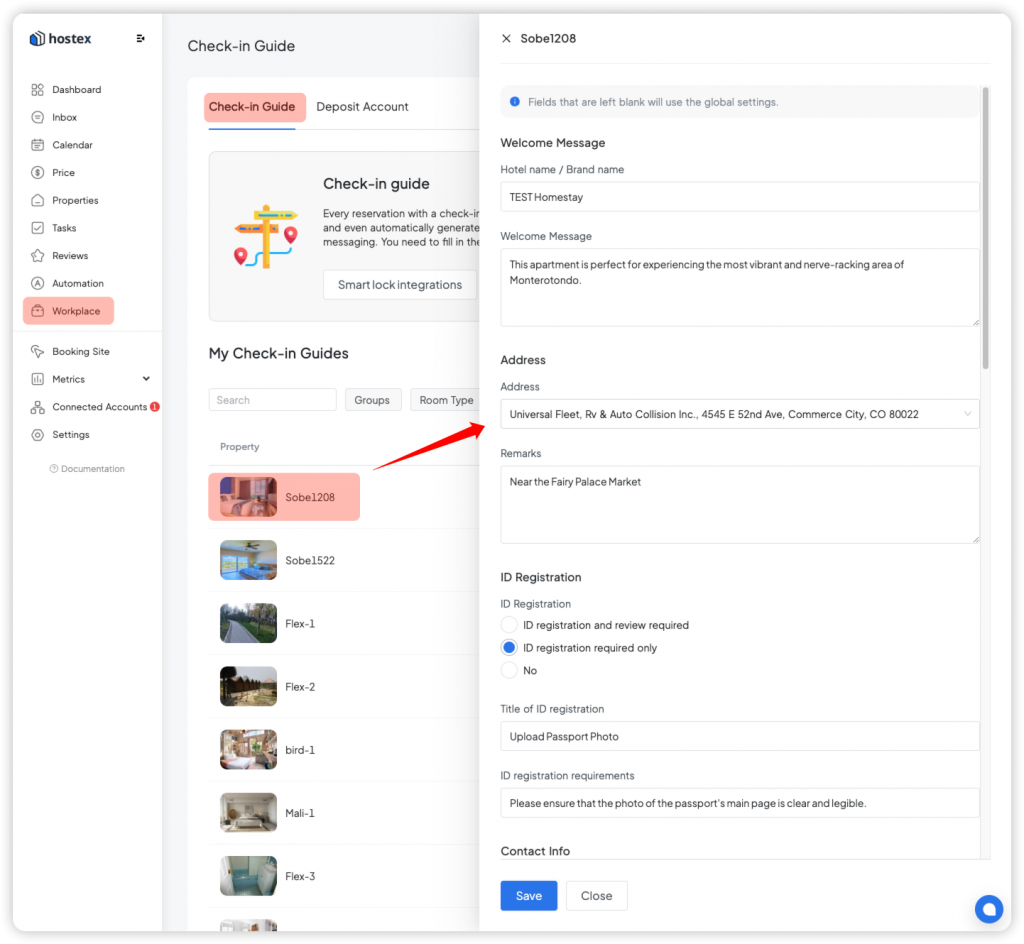
1. Set check-in info of a property
- Go to the WorkPlace – Check-in Guide section.
- Click on a property.
- Fill in all the check-in information your guests need to know about.
- Click the button to Save.
2. Global Settings
Global information is the generic default setting for all properties within the Hostex system.
It includes information such as the general address, welcome message, landlord’s phone number, ID registration requirements, lock code visible time, etc.
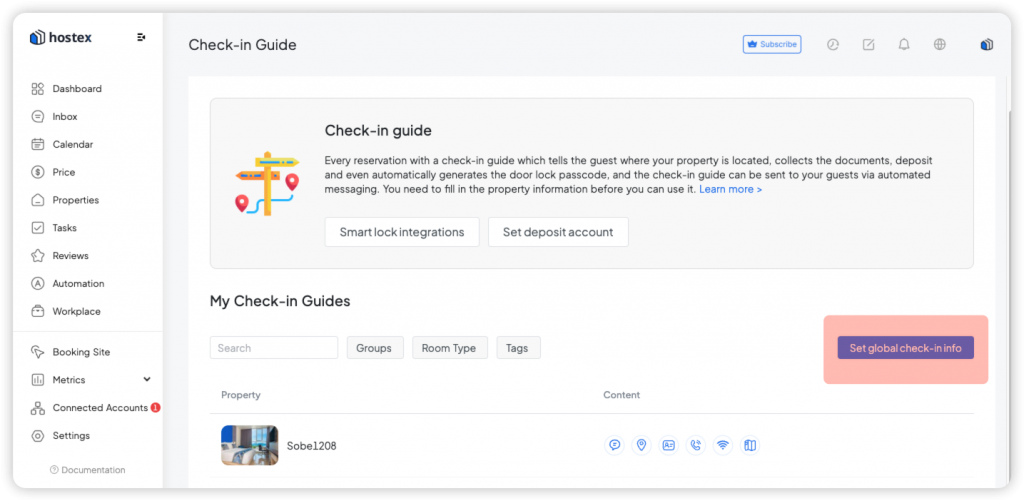
Note: When the info on property conflicts with the global info, the property info will prevail and be sent to the guest.
How do you send the check-in guide to guests?
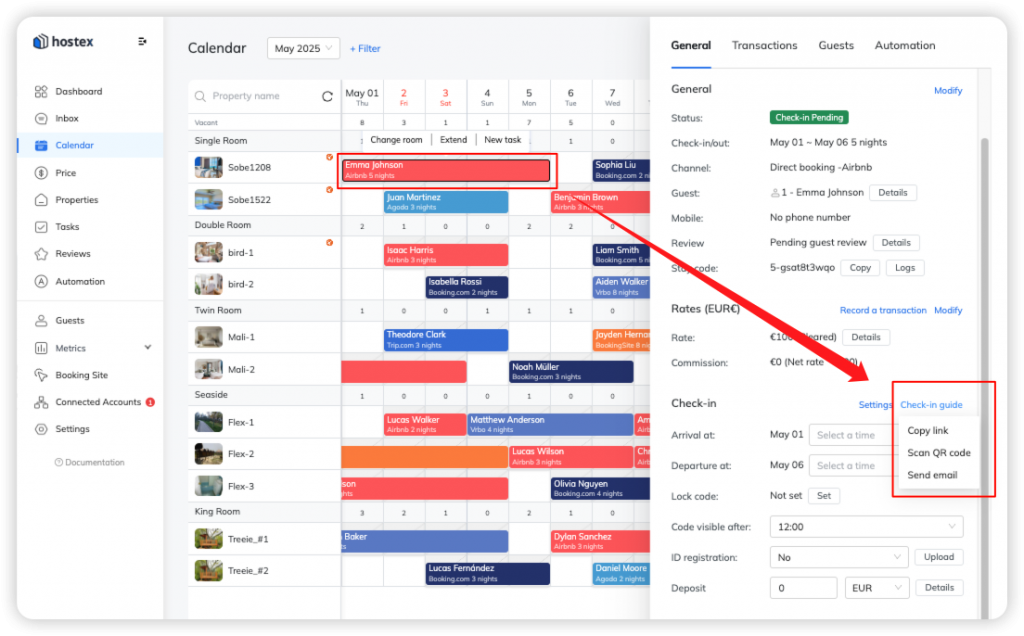
1. Sending manually
Click “Check-in Guide” on the reservation details page to select a way to send the check-in guide to the guest.
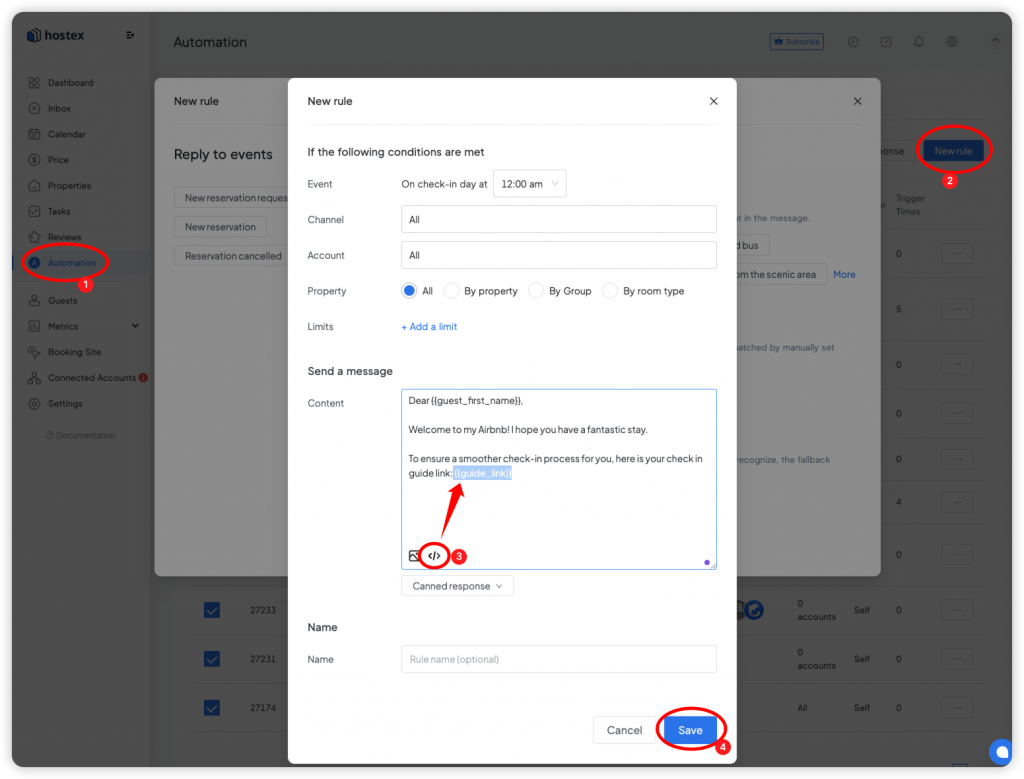
2. Sending automatically
- Click the Automated Messaging in the Automation section.
- Click the + button to create a new tule.
- Create a Reservation or Check-in Info trigger.
- Include the shortcode for the check-in guide link within the message template.
- Save your rule.

Note.
1. If a reservation is made on the same day as the check-in date, any automated message rules within 3 days before the check-in date will be triggered.
2. The time of automation is determined by the property’s time zone.
3. If the guest has never sent you a message, the channels do not allow sending messages to guests through third-party platforms, so the auto-message you set on Hostex cannot be sent, you need to go to the channel site and initiate a conversation first.
4. If Booking.com blocks your Hostex check-in guide link, click here to learn how to unblock it.