Starting a short-term rental journey can feel overwhelming, especially when you first begin searching for guidance on how to list on Airbnb. You need a clear understanding of each step before you publish your first Airbnb listing. Careful preparation helps you avoid costly mistakes and gives you a strong foundation for future growth.
In this guide, you will find a complete and practical roadmap. It covers everything from creating your account and naming your place to taking photos, setting prices, and handling your first reservation. Each step is simple to follow so that you can move forward with confidence.
If you already list your property on Airbnb, Booking.com, or Vrbo, it may be time to streamline your workflow. A professional short-term rental management system, such as Hostex, can help you automate more than 70% of daily tasks. As a result, you save time and reduce unnecessary costs. Pricing starts at only $4.9 per month.

9 Things You Must Confirm Before Listing on Airbnb
Rushing to list your property on Airbnb without preparation often leads to unnecessary problems. From my experience managing multiple short-term rentals, taking the time to confirm the following items upfront will save you weeks of stress and help you start strong.
1. Local regulations and permits
Every city or municipality has different short-term rental rules. Some require registration, licenses, or limit the number of rental days. Overlooking these rules can result in fines or even being delisted.
Check your city’s official resources for permits and zoning laws. Keep digital copies of all approvals and set calendar reminders for renewals. For complex cases, consult a local short-term rental advisor.
2. Taxes
Short-term rental income is taxable, and regulations vary by region. Misunderstanding tax obligations can lead to penalties or unexpected bills.
Track all income and expenses from day one using accounting software. Consider consulting a tax professional familiar with Airbnb startups to optimize deductions and remain compliant.
3. Insurance
Not all homeowner insurance covers Airbnb guests. Standard policies may exclude short-term rental incidents, leaving you unprotected.
Get a policy tailored for vacation rentals or add a rider to your current insurance. Coverage should include property damage, liability, and guest injuries. Protecting your investment is essential for long-term success.
4. Property safety
Guest safety is critical for reputation and compliance. Smoke detectors, fire extinguishers, secure locks, and emergency exits are the basics, but small hazards are often overlooked.
Walk through your property as if you were a guest. Create a safety checklist and review it regularly. Safe properties lead to higher reviews and repeat bookings.
5. Target audience
Understanding your ideal guests informs pricing, amenities, and marketing. Families, business travelers, and couples have very different expectations.
Define your primary audience and tailor your property features accordingly. For example, families value safety gates and child-friendly items, while business travelers prioritize fast Wi-Fi and workspace.
6. Positioning and competitor analysis
Knowing the local market helps you set competitive pricing and highlight your unique selling points.
Analyze nearby Airbnb listings for rates, occupancy, and guest reviews. Identify gaps you can fill, such as offering flexible check-in times, superior cleanliness, or added amenities.
7. Cleaning and maintenance plan
Consistent quality and rapid turnover are crucial for positive reviews and high occupancy. Poorly maintained properties can hurt ratings and revenue.
Create a cleaning SOP with clear checklists for turnover. Plan routine maintenance and schedule deep cleans during low-demand periods. Consider a property management system to automate reminders.
8. Interior design and budget
Vacation rental guests have high expectations for comfort and style. Functional and appealing interiors improve guest satisfaction and justify higher pricing.
Invest in durable, easy-to-clean furniture and neutral decor. Track spending against budget to ensure profitability while maintaining a strong guest experience.
9. Management tools
When you plan to list your property on multiple platforms, each platform has its own management interface. Daily tasks such as updating calendars, adjusting pricing, responding to guests, and scheduling cleaning can quickly pile up, especially if you manage multiple properties. This increases the risk of mistakes and missed opportunities.
That is why considering Airbnb tools from the start can save time and reduce operational stress while maintaining high performance for your listings.
Common solutions include:
- Intelligent dynamic pricing systems (e.g., PriceLabs): Automatically adjust your rates based on demand, seasonality, and competitor activity to maximize revenue.
- Property Management Systems (e.g., Hostex): Centralize calendars, bookings, guest messages, and task management across all your listings, avoiding confusion from juggling multiple platforms.
- Direct booking website builders: Create your own site to accept direct bookings and reduce reliance on platform commissions.
- Automated messaging systems: Send instant responses for common questions or booking confirmations to improve response times and guest satisfaction.
- Cleaning management tools: Schedule and track housekeeping tasks and maintenance reminders to ensure a consistent guest experience.

How to List on Airbnb: Step-by-Step Guide
1. How to Create and Optimize an Airbnb Account
Setting up an Airbnb account is straightforward. Like most websites, Airbnb guides you through the registration process step by step:
- Sign-up process: Enter your basic information, verify your email, and agree to Airbnb’s terms.
- Enable 2-factor authentication: Adding this extra security layer helps protect your account and guest information.
For new hosts, your profile matters a lot because you do not have reviews yet. A well-crafted account builds trust and encourages bookings. Pay attention to the following elements:
- Verification: Complete all Airbnb verification steps, such as ID confirmation and phone/email verification, to signal credibility.
- Profile photo: Choose a clear, friendly, and professional picture. It helps guests feel more comfortable booking with you.
- Host bio: Write a genuine, warm, and professional description. Share your hosting philosophy, experience, or what makes your space special. In other words, show your personality while reassuring guests of a reliable stay.
2. How to List Your Property on Airbnb
Once your Airbnb account is ready, the next step is listing your property. This is the foundation of hosting an Airbnb.
Step-by-step listing process:
- Log in to your Airbnb account and click on “Host” in the top menu. Then select “Add a new listing.”
- Choose your property type. Airbnb will ask whether your space is an entire home, a private room, or a shared room. Make your selection carefully, as it affects your target guests.
- Enter your location. Provide the full address, including postal code. Accurate location information helps Airbnb calculate travel time and display your listing in search results.
- Provide basic property details. Input the number of guests your space can accommodate, bedrooms, beds, and bathrooms. This ensures guests understand your capacity at a glance.
- Set initial availability. Choose start and end dates for bookings, or set your calendar as open. At this stage, you can also apply minimum stay rules, which we will explore in later sections.
- Confirm amenities. Select the features your property offers, such as Wi-Fi, air conditioning, kitchen access, or parking. This helps your listing match guest searches accurately.
- Review and save. Airbnb will summarize your initial listing information. You can save it as a draft to refine later or continue to the next steps, including adding a listing title, description, photos, and pricing.
3. How to Craft High-Converting Listing Titles and Descriptions
A strong title and well-written description are essential when listing on Airbnb. They influence both search visibility and guest booking decisions. In other words, your title and description are often the first impression guests get of your property.
① Title Tips:
Your Airbnb title should be short, clear, and highlight the main selling point. Focus on what makes your property unique. For example, include: location, view, special amenities, or property type. Keep it under 50 characters if possible.
Example Templates:
- Cozy 2BR Apartment with City View
- Beachfront Studio Perfect for Couples
- Modern Loft Near Downtown Attractions
- Family-Friendly Home with Pool
- Quiet Retreat Steps from Metro
② Description Tips:
The first 50 words of your listing description are crucial. Start with a compelling statement that captures attention and clearly communicates what guests can expect. Use a friendly and professional tone.
Next, organize details with bullet points or small sections. Include:
- Amenities: Wi-Fi, kitchen, parking, air conditioning, laundry
- House Rules: Check-in/check-out times, pet policy, smoking rules
- Nearby Attractions: Restaurants, parks, transport links
This structure makes the listing easy to scan and improves guest understanding.
③ Using FAQs and House Manuals
Consider adding a quick FAQ section or a house manual. This answers common guest questions upfront, such as:
- Is parking available?
- How do I access the property?
- Are towels and linens provided?
This reduces guest confusion and potential disputes, while also improving trust and booking confidence.
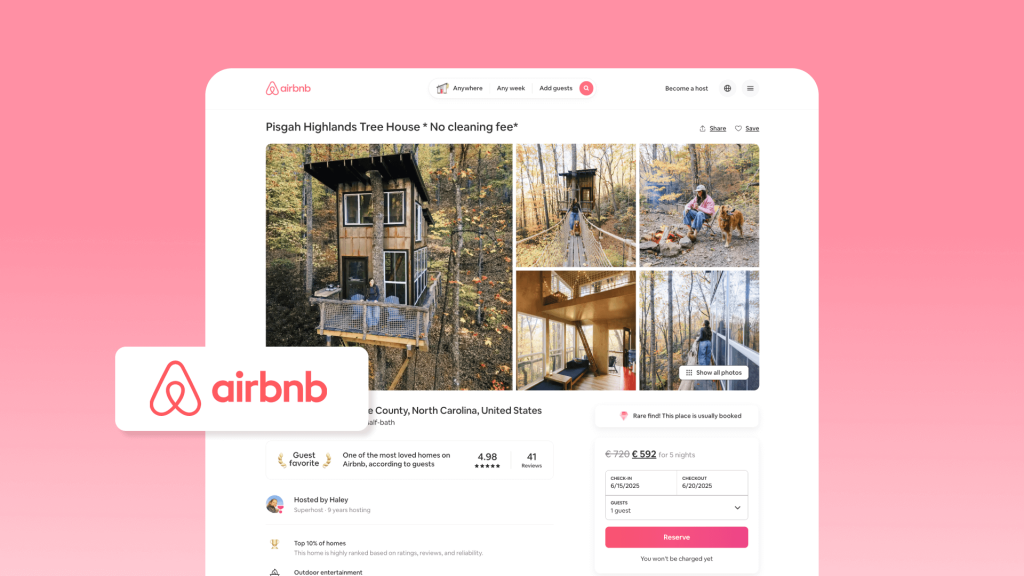
4. How to Take Photos That Boost Bookings
Humans are visual creatures, so the quality of your photos can make or break your Airbnb listing. In fact, the first cover photo plays a crucial role. It must highlight your property’s main selling points and immediately grab attention.
① Essential Shots to Include
When preparing your Airbnb listing photos, make sure you cover:
- Exterior: Showcase the building or home facade and the surrounding environment
- Wide-angle Room Shots: Give a sense of space in living areas, bedrooms, and the kitchen
- Key Amenities: Highlight features like the pool, balcony, kitchen appliances, or workspace
- Details: Small touches like decor, bed setup, or view from the window
② Lighting, Angles, and Composition
Good lighting is critical. Natural light works best, so schedule photos during the day. Avoid harsh shadows or overly dim rooms.
Shoot from corners to capture as much space as possible. Keep lines straight and perspective consistent.
③ Simple Editing
Basic post-processing can improve your photos without making them look fake. Adjust:
- Brightness and contrast for clarity
- Color consistency across all images
- Cropping to remove distractions
④ Hiring a Professional vs DIY
Professional photographers can save time and provide high-quality images that boost conversion. However, if the budget is tight, a modern smartphone combined with good lighting and simple edits can still produce excellent results. Evaluate the cost-benefit based on your listing potential.
5. How to Set Your Initial Airbnb Pricing
As a new host, setting the right price is crucial. Your initial pricing strategy can help your listing gain visibility and attract the first bookings.
① Introductory vs Regular Pricing
Many new hosts offer an initial lower rate to encourage early reservations. This can help you build reviews and credibility. Once your listing receives feedback, you can gradually adjust to a standard rate.
② Dynamic Pricing Tools
Consider using dynamic pricing tools like PriceLabs. They can automatically adjust rates based on demand, season, and local events. If you prefer manual control, set rules for weekends, holidays, and high-demand periods.
③ Key Pricing Components
- Minimum Stay: Set a reasonable minimum night requirement to balance occupancy and convenience.
- Weekend Premium: Charge slightly higher rates for weekends when demand is higher.
- Cleaning Fee: Reflect actual costs without scaring off guests.
- Special Promotions: Offer short-term discounts to attract early bookings.
④ Optimization Cycle
Track bookings during the first month. Review every 7 or 30 days to see how your price performs. Adjust based on occupancy, guest feedback, and competitor rates. This ensures your listing remains competitive while maximizing revenue.
6. How to Manage Your First Bookings
The first bookings are critical. They help you gain initial reviews and set the tone for future guests. Standardizing your hosting workflow early will save time and prevent mistakes.
① Handling Inquiries
Respond promptly to guest questions. Quick replies improve your listing’s visibility and build trust. Prepare template responses for common inquiries, but always personalize them to show attentiveness.
② Booking Confirmation
Once a guest books, confirm the reservation quickly. Check your calendar for conflicts and send a warm welcome message. This reassures guests and reduces the risk of cancellations.
③ Pre-Arrival Reminders
Send clear check-in instructions ahead of arrival. Include directions, access codes, parking information, and house rules. Guests appreciate transparency, which often leads to better reviews.
④ Check-In and Self-Check-In Process
If you use self-check-in, ensure the system works smoothly. Provide photos or short videos to guide guests. If hosting in person, greet guests warmly and answer any questions.
⑤ Handling Issues During Stay
Create a simple SOP for common problems, such as Wi-Fi issues, appliance malfunctions, or noise complaints. Quick and professional responses improve guest satisfaction and protect your reviews.
⑥ Check-Out Instructions
Provide clear check-out procedures. Include reminders about keys, trash disposal, and leaving the property tidy. Consider sending a thank-you message after check-out to leave a positive impression.
⑦ Post-Check-Out Cleaning
After guests leave, perform a thorough cleaning promptly. Follow a standardized checklist covering all rooms, linens, and amenities. This ensures the property is ready for the next booking and helps maintain high guest satisfaction. If you work with cleaners, communicate special requests or attention areas in advance.
⑧ Reviews
Leaving timely reviews for your guests is important. It builds credibility and encourages them to leave feedback for you. When responding to guest reviews, stay professional and friendly, addressing any concerns politely. Positive engagement can enhance your reputation and improve future booking rates.

Automation and Tools for Airbnb Hosting
As we discussed earlier, using the right tools can save you a lot of time and effort. For new hosts, automation is not just convenient; it is essential for scaling operations efficiently.
Professional property management systems can help you manage multiple listings and streamline daily tasks. Key features to consider include:
- Calendar Syncing: Automatically updates availability across all platforms to prevent double bookings.
- Price Management: Adjusts rates dynamically or according to rules you set.
- Message Automation: Sends pre-scheduled messages to guests, such as booking confirmations or check-in instructions.
- Automated Guest Inquiries: Responds to common questions immediately, ensuring guests receive timely information.
- Cleaning Task Assignment: Automatically schedules and notifies cleaners based on check-ins and check-outs.
- Review Management: Helps you leave reviews for guests and track feedback efficiently.
- Income Reporting: Provides clear financial overviews of your Airbnb performance.
- Direct Booking Website: Create your own website for direct bookings with zero coding or fees and publish it to Google Vacation Rentals in one click.
Practical Tip: Start with a free trial to explore the features. Once you understand how it fits your workflow, you can gradually expand its use to manage more listings or automate additional tasks.

Airbnb Listing FAQ for New Hosts
Q1: Do I need a business license to list on Airbnb?
It depends on your city or municipality. Many local governments require short-term rental registration or a business license, and some areas even limit the number of nights you can rent. My advice is to check official sources before listing. Failing to comply can result in fines or forced delisting. If licensing is complex, consider starting with a single property to learn the rules before scaling up.
Q2: How should I set a cleaning fee?
Calculate the real cost: professional cleaning, supplies, and your time if you do it yourself. A common mistake is overcharging, which can scare away guests. Conversely, undercharging can eat into profits. A practical approach is to benchmark nearby listings with similar size and quality. Update your cleaning fee if you improve services or hire professional cleaners.
Q3: How do I handle damage or security deposits?
Airbnb offers AirCover, but it’s not a substitute for preventive measures. Always document the property with photos or videos before check-in. For high-value items, consider optional security deposits. Clearly communicate policies in your house rules to avoid disputes. Respond to damage claims quickly and politely to maintain a positive relationship.
Q4: Should I install a smart lock immediately?
Smart locks are convenient for self-check-in and reduce coordination stress. However, they can be costly and sometimes complicated for less tech-savvy guests. For a single property or small-scale hosting, a high-quality traditional lock can suffice initially. If you plan to manage multiple listings or remote hosting, investing in smart locks pays off quickly.
Q5: How long until I receive my first payout?
Airbnb releases payments 24 hours after the guest checks in, but processing times depend on your bank. Make sure your account is verified, and all banking information is accurate. Personally, I recommend testing the payout with a small amount first to ensure everything works smoothly before scaling.
Q6: How old do I have to be to host an Airbnb?
Generally, the minimum age to host is 18. However, some cities or states set higher limits. For example, certain US cities require hosts to be at least 21 years old. Additionally, specific property types—such as luxury stays or unique experiences—may have their own age rules for hosts.
Q7: How many photos should I upload?
Aim for 15–20 high-quality photos covering all main areas and unique amenities. The first photo is critical—it should show your strongest feature and make guests imagine themselves there. Use natural light and clean staging. If possible, consider hiring a professional photographer. Even a modest investment in photos often results in a higher booking rate.
Q8: How can I improve my Airbnb ranking as a new host?
Response time, completeness, and accuracy matter most. Reply promptly to inquiries, ensure your calendar is updated, and complete your listing details. Encourage early guests to leave honest reviews, even offering small personalized touches to create memorable experiences. Over time, consistent performance improves your search ranking significantly.
Q9: Should I set a minimum stay?
Yes, but balance is key. Setting a too-long minimum stay may reduce bookings, while a too-short one may increase cleaning and turnover stress. Analyze local demand: weekends, holidays, and special events often allow longer minimum stays. Start conservatively and adjust based on booking patterns and guest feedback.
Q10: Can I manage multiple listings efficiently?
Managing several listings manually is stressful and error-prone. A property management system (PMS) can centralize calendars, automate messages, assign cleaning tasks, and manage pricing. Even small hosts benefit from automation, which reduces double bookings and improves guest experience. Choose a PMS that fits your scale and workflow.
Q11: What common mistakes should I avoid as a new host?
Incomplete profiles, unclear photos, missing amenities, ignoring inquiries, and poor communication are the top pitfalls. Standardize your hosting workflow, respond promptly, and make house rules clear. Small improvements in these areas yield disproportionate gains in guest satisfaction and booking frequency.